
![S.H.Figuarts Black Widow (Snow Suit) [Black Widow]](https://www.rioxteir.com/wp-content/uploads/2021/07/SHFiguarts-Black-Widow-Snow-Suit-Black-Widow-Movie-Cover-218x150.jpg "S.H.Figuarts Black Widow (Snow Suit) [Black Widow]")


![S.H.Figuarts Black Window [Avengers]](https://www.rioxteir.com/wp-content/uploads/2021/06/SHFiguarts-Avengers-Black-Window-front-cover-218x150.jpg "S.H.Figuarts Black Window [Avengers]")
Greeting guys !! this time I just want to share a simple technique by using Photoshop for a beginner like me. Its a Photoshop Tutorial How To Make A Figure Floating or Flying or whatever you can imagine for your own need. The trick is simple, just take 2 shot, one with a floating figure or object in it and one with the background only but with the same angle.
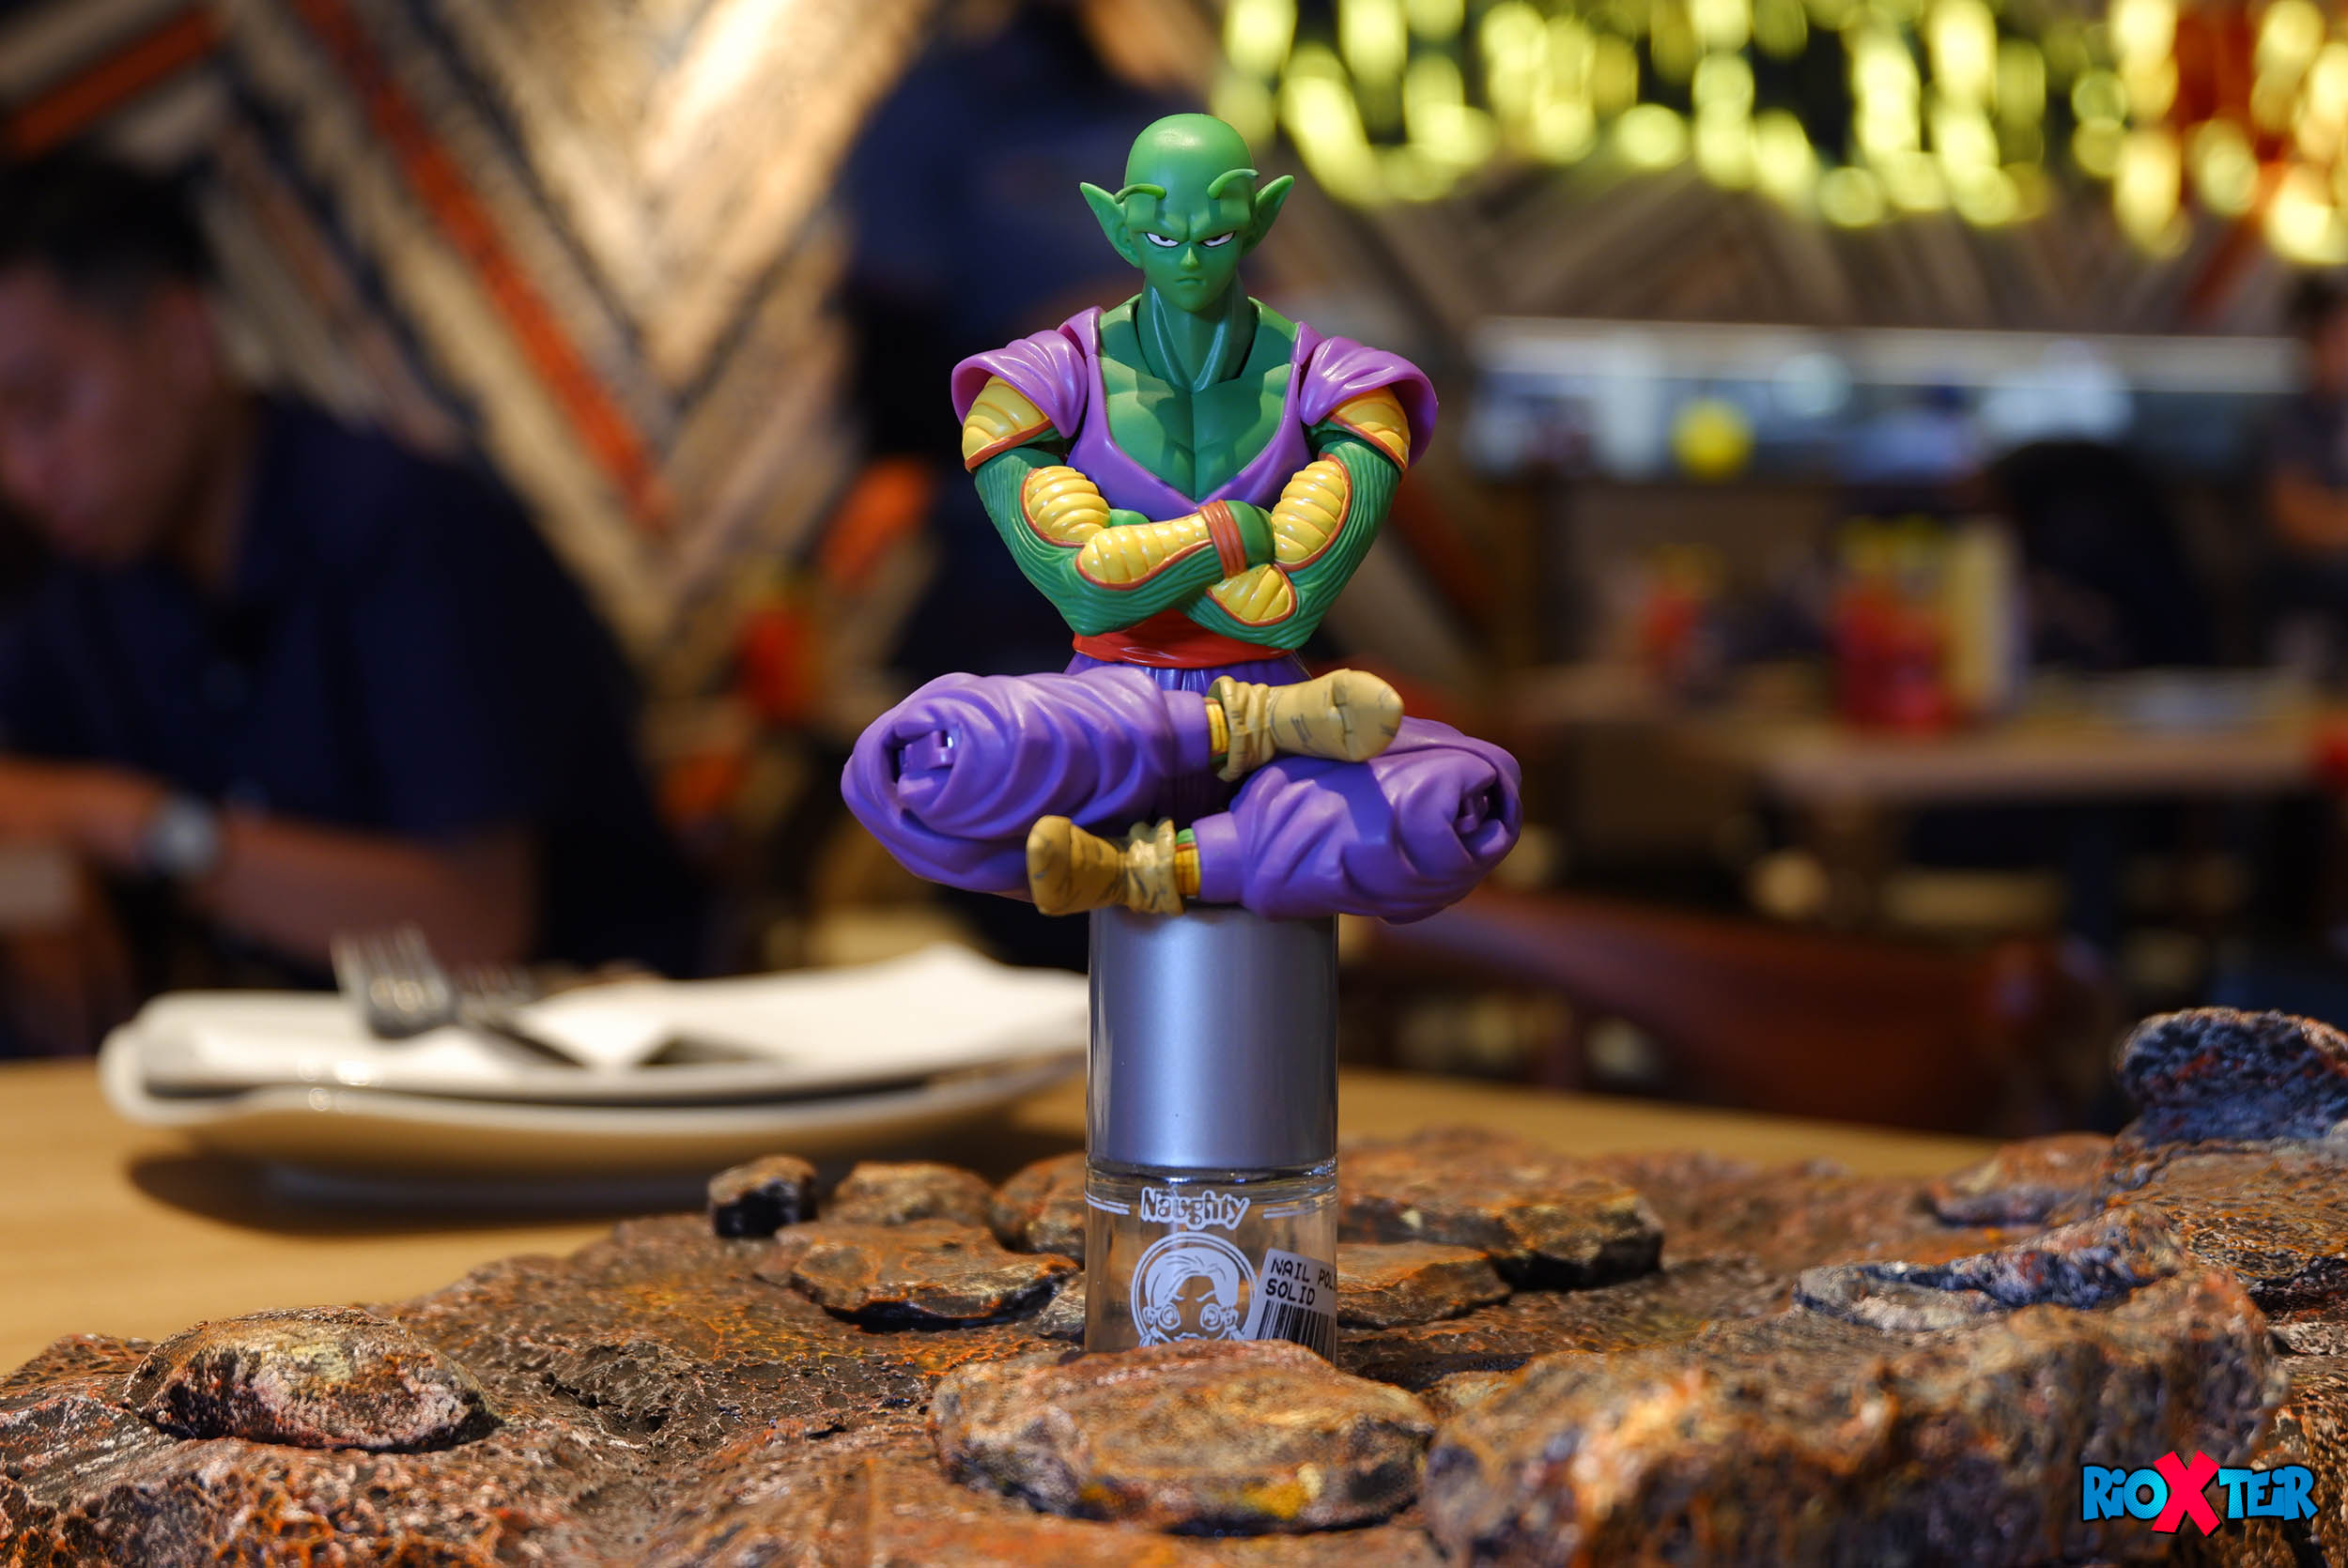
In the image below I put the S.H.Figuarts Piccolo [Dragon Ball Z] with his floating pose by using a small bottle of nail polish. You can think whatever you can imagine how to make it flying such as with your hand in the back of the figure, or stand base and a small wire can do the job better. Whatever you choose just try to hide it in the back of your figure so you can make your work easier.
And this is the background image for the second shot, you don’t need to worry if somebody or something accidentally appeared in your shot. Just make sure the angle is same with the previous image. If your camera lens has autofocus, keep your figure first and hold the autofocus, just take away your figure while you hold the autofocus to keep the blur in the background same with the previous image, and just push the shot.

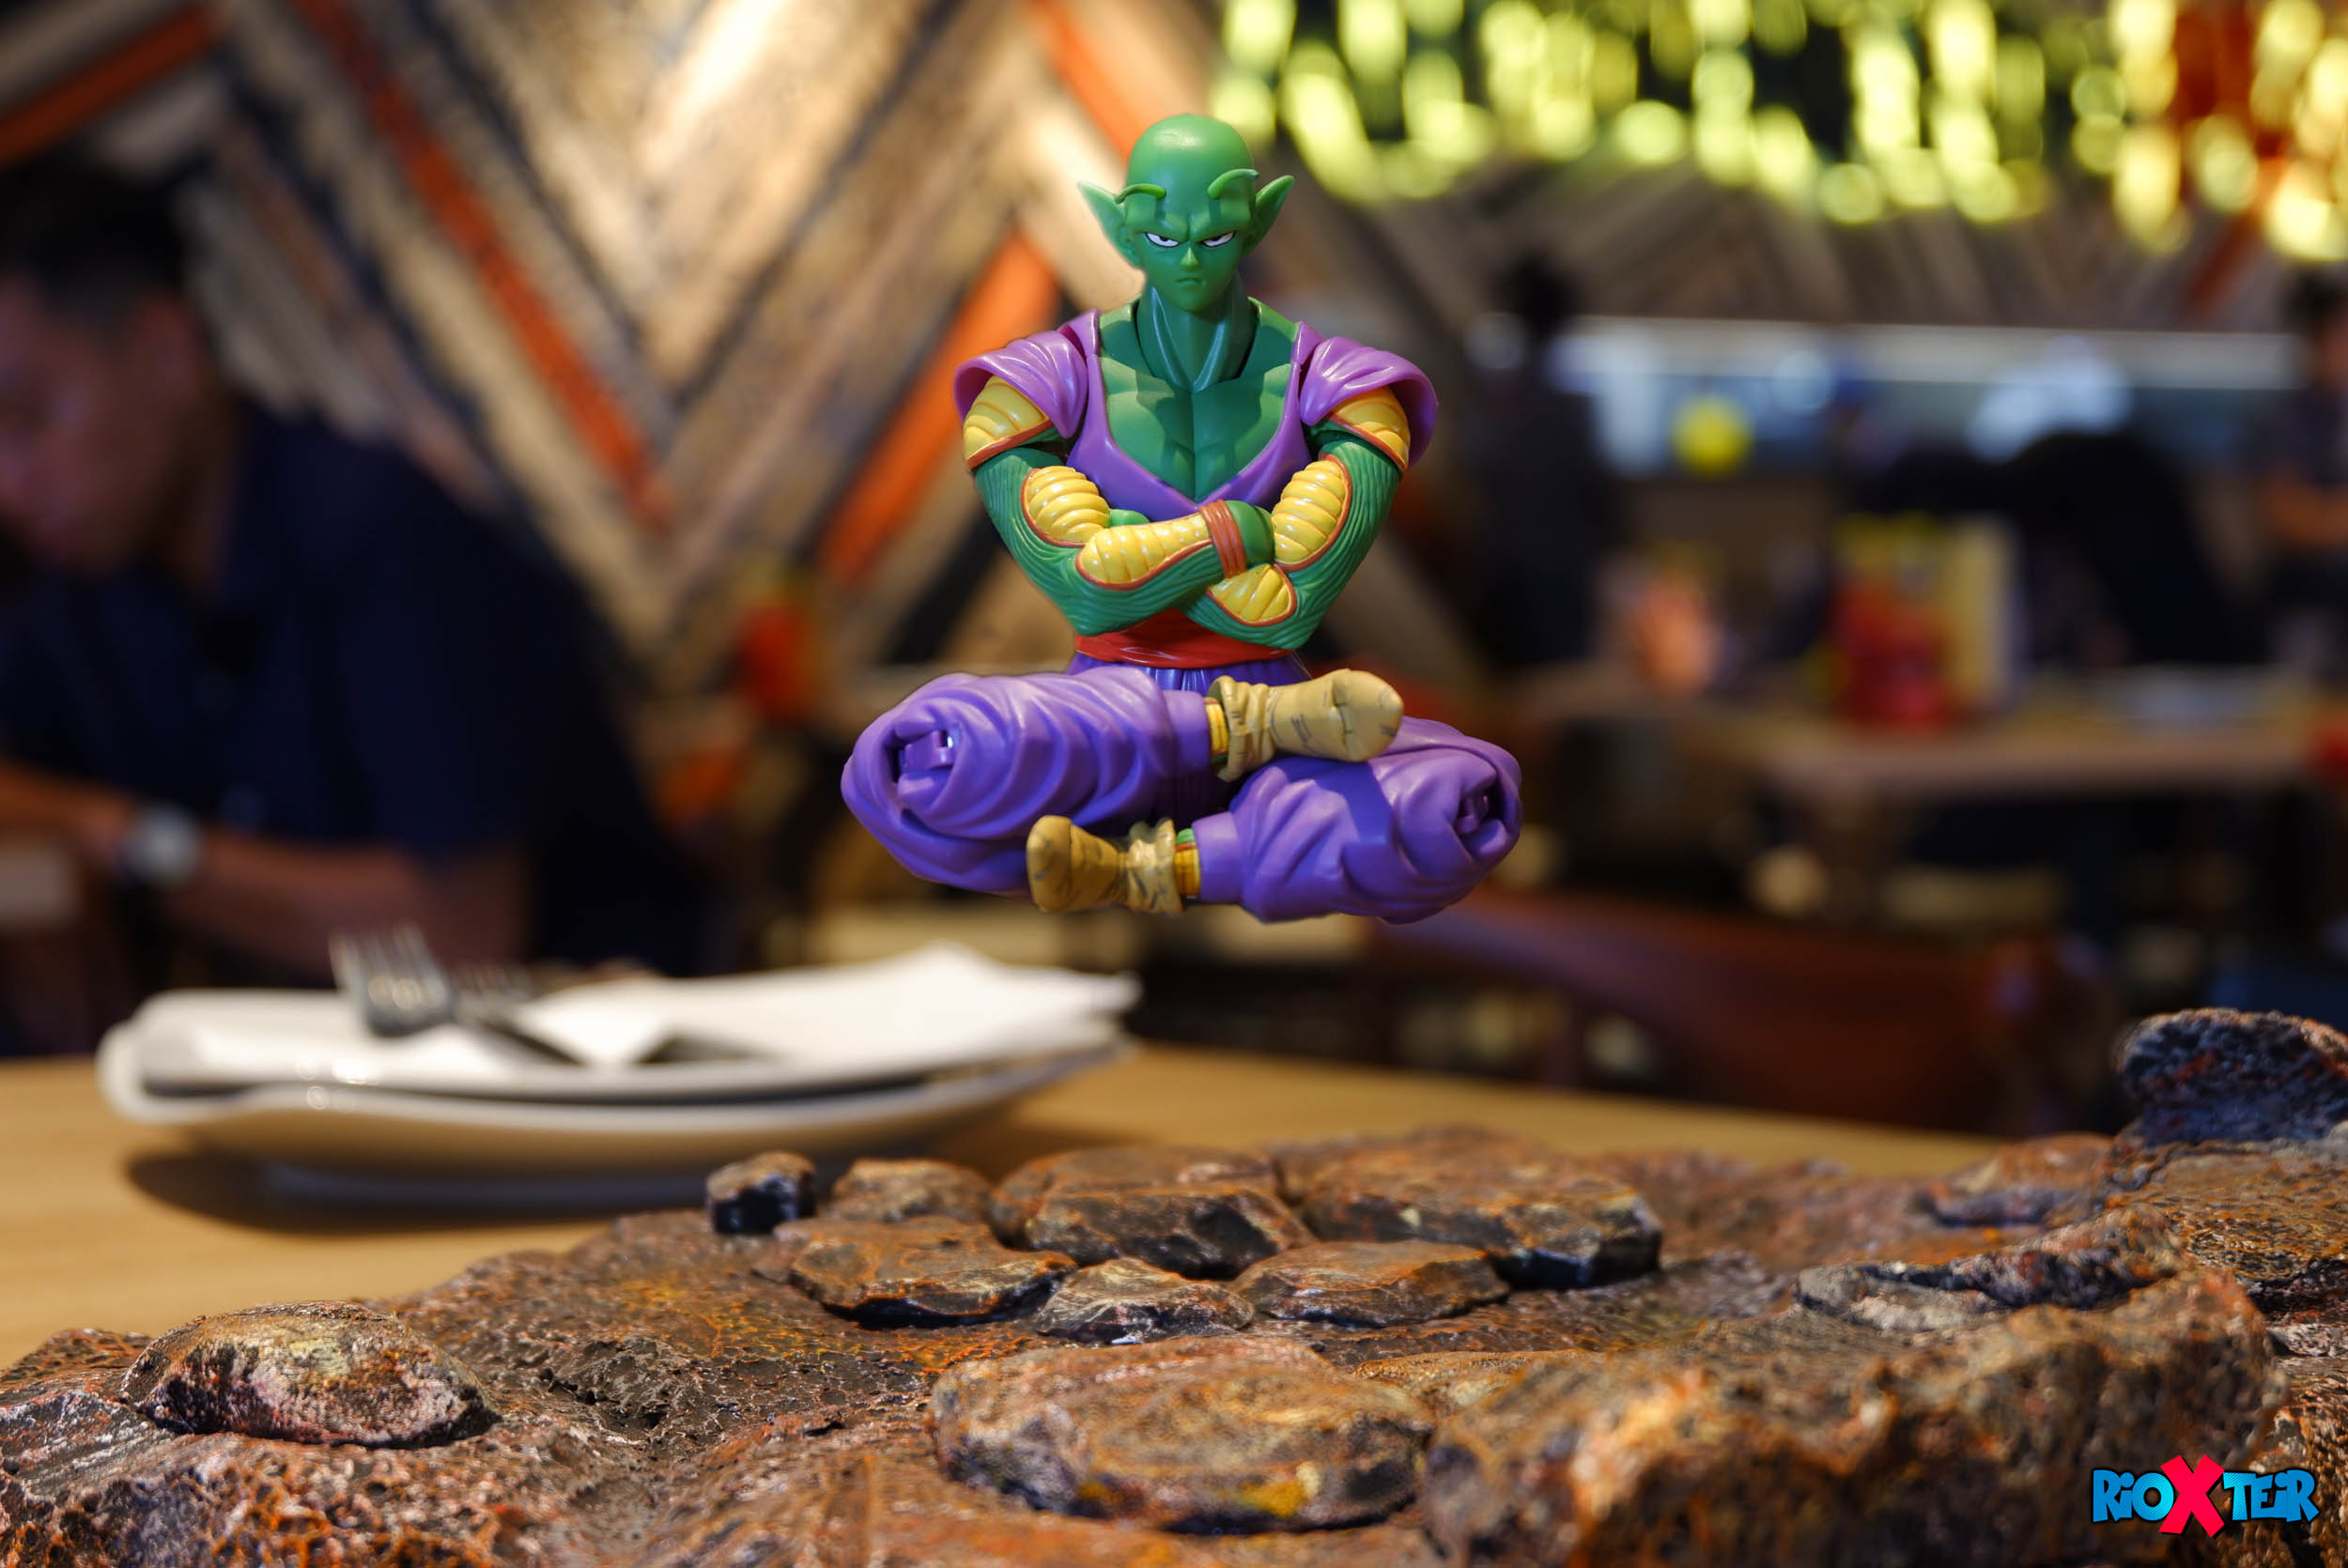
Here is the final result of my Photoshop Tutorial How To Make A Figure Floating or Flying. It was really simple than to crop your object, but the cons are you can’t move your object easily.
You can also visit my Youtube Channel HERE
For more toys photography please visit my Instagram @rioxteir


![S.H.Figuarts Son Goku Ultra Instinct [Dragon Ball Super]](https://www.rioxteir.com/wp-content/uploads/2020/03/SHFiguarts-Dragon-Ball-Super-Son-Goku-Ultra-Instinct-01-100x70.jpg "S.H.Figuarts Son Goku Ultra Instinct [Dragon Ball Super]")

